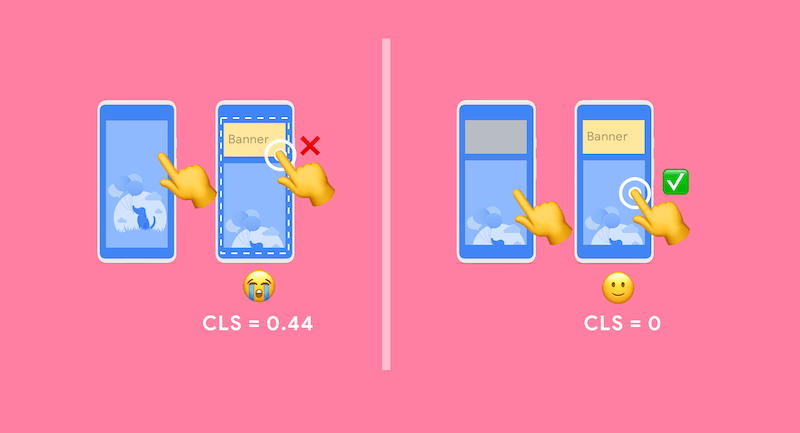
本站已不再采用本方案,新方案见使用Hugo实现响应式和优化的图片
遗留的问题
上一篇文章讲了我是如何解决博客累计布局偏移的问题,但是这个方案存在一个很大的问题。
手动输入每张图片的宽高
这就要求每次插入图片后,需要手动查看图片宽高,修改插入代码,导致整个流程变得繁琐,无法自动化。
身为一名工程师,对于这样一个痛点,势必要优化掉。
思路
发完上一篇文章后,我一直在想怎么能实现自动化插入图片宽高。
要插入的图片代码是类似这样的:
{{< figure src="https://static.liudon.com/img/cover-code.png" alt="cover.html code" width="2020" height="1468" >}}
我使用了picgo插件,上传图片到腾讯云对象存储,然后复制markdown图片代码插入文章。
能不能通过改造picgo插件,将上传后复制的代码,加上图片的宽高参数?
通过一番搜索,发现此方案不通,picgo确实支持自定义代码,但是变量仅支持文件名和url。

此路不通,只好再想新的办法了。
对象存储的图片处理有接口,可以返回图片的宽高信息,详细说明见获取图片基本信息。
能不能在生成文件的时候,通过发起一个请求拿到图片宽高,然后写入html代码?
经过一番搜索,发现hugo支持请求url,详细说明见Get Remote Data。
{{ $dataJ := getJSON "url" }}
{{ $dataC := getCSV "separator" "url" }}
哈哈,柳暗花明又一村的感觉。
解决方案
此方案基于对象存储获取图片宽高,然后写入图片解析模板。
新增
css配置新增如下配置,否则会导致图片变形。
img {
    width:100%;
    height:auto;
}

figure {
    background-color: var(--code-bg);
}
添加
render-image.html文件代码如下:
{{- $item := getJSON .Destination "?imageInfo&t=" now.Unix -}}
{{/* 通过对象存储接口获取图片宽高,因为我使用了cdn,所以增加随机数保证拿到最新的图片宽高参数 */}}

{{- $Destination := .Destination -}}
{{- $Text := .Text -}}
{{- $Title := .Title -}}

{{- with $item }}
<picture>
    <source type="image/webp" srcset="{{ $Destination | safeURL }}/webp" width="{{ .width }}" height="{{ .height }}">
    <img loading="lazy" src="{{ $Destination | safeURL }}" alt="{{ $Text }}" {{ with $Title}} title="{{ . }}" {{ end }} width="{{ .width }}" height="{{ .height }}" />
</picture>
{{- end -}}
添加
cover.html文件代码如下:
{{- with .cxt}} {{/* Apply proper context from dict */}}
{{- if (and .Params.cover.image (not $.isHidden)) }}
{{- $alt := (.Params.cover.alt | default .Params.cover.caption | plainify) }}
<figure class="entry-cover">
    {{- $responsiveImages := (.Params.cover.responsiveImages | default site.Params.cover.responsiveImages) | default true }}
    {{- $addLink := (and site.Params.cover.linkFullImages (not $.IsHome)) }}
    {{- $cover := (.Resources.ByType "image").GetMatch (printf "*%s*" (.Params.cover.image)) }}
    {{- if $cover -}}{{/* i.e it is present in page bundle */}}
        {{- if $addLink }}<a href="{{ (path.Join .RelPermalink .Params.cover.image) | absURL }}" target="_blank"
            rel="noopener noreferrer">{{ end -}}
        {{- $sizes := (slice "360" "480" "720" "1080" "1500") }}
        {{- $processableFormats := (slice "jpg" "jpeg" "png" "tif" "bmp" "gif") -}}
        {{- if hugo.IsExtended -}}
            {{- $processableFormats = $processableFormats | append "webp" -}}
        {{- end -}}
        {{- $prod := (hugo.IsProduction | or (eq site.Params.env "production")) }}
        {{- if (and (in $processableFormats $cover.MediaType.SubType) ($responsiveImages) (eq $prod true)) }}
        <img loading="lazy" srcset="{{- range $size := $sizes -}}
                        {{- if (ge $cover.Width $size) -}}
                        {{ printf "%s %s" (($cover.Resize (printf "%sx" $size)).Permalink) (printf "%sw ," $size) -}}
                        {{ end }}
                    {{- end -}}{{$cover.Permalink }} {{printf "%dw" ($cover.Width)}}"
            sizes="(min-width: 768px) 720px, 100vw" src="{{ $cover.Permalink }}" alt="{{ $alt }}"
            width="{{ $cover.Width }}" height="{{ $cover.Height }}">
        {{- else }}{{/* Unprocessable image or responsive images disabled */}}
        <img loading="lazy" src="{{ (path.Join .RelPermalink .Params.cover.image) | absURL }}" alt="{{ $alt }}">
        {{- end }}
    {{- else }}{{/* For absolute urls and external links, no img processing here */}}
        {{- $item := getJSON .Params.cover.image "?imageInfo&t=" now.Unix -}}
        {{/* 通过对象存储接口获取图片宽高,因为我使用了cdn,所以增加随机数保证拿到最新的图片宽高参数 */}}
        {{- $coverUrl := .Params.cover.image -}}
        {{- with $item }}
        {{- if $addLink }}<a href="{{ $coverUrl | absURL }}" target="_blank"
            rel="noopener noreferrer">{{ end -}}
            <picture>
            <source type="image/webp" srcset="{{ $coverUrl | absURL }}/webp" width="{{ .width }}" height="{{ .height }}">
            <img loading="lazy" alt="{{ $alt }}" src="{{ $coverUrl | absURL }}" width="{{ .width }}" height="{{ .height }}">
            </picture>
        {{- end }}
    {{- end }}
    {{- if $addLink }}</a>{{ end -}}
    {{/*  Display Caption  */}}
    {{- if not $.IsHome }}
        {{ with .Params.cover.caption }}<p>{{ . | markdownify }}</p>{{- end }}
    {{- end }}
</figure>
{{- end }}{{/* End image */}}
{{- end -}}{{/* End context */ -}}
使用方式和原来不变,插入markdown语法的图片代码即可。

这下又可以愉快地码字了。
